Opening and removing the VR-730 keybed
A big thank to David Webster for having written this document
The first thing to remember is that opening up a keyboard is generally not approved by the manufacturer so don’t expect help from them if anything goes wrong. Any damage you cause will be down to you to fix or pay someone to do it, your warranty may be voided.
This is meant as a guide of what to expect when you open up a VR730 along with some useful tips to make it easier. It isn’t a detailed instruction manual and its assumed that you have some experience in opening keyboards and the like; also that responsibility for any damage you may cause or injury sustained is yours alone. That said there is nothing technically taxing in opening up the VR730, just requires care and a basic level of skill. Before you start make sure you have backed up any saved registrations and settings.
Tools needed –
- Medium cross head screwdriver (preferably magnetic as a many screws are deeply recessed)
- Small cross head screwdriver
- Something to keep the loose screws in
- A clear space to work with something soft to lay the keyboard on
- Disconnect all cables and the Power supply.
Turn the keyboard over on a soft padding taking care to put extra padding either side side of the modulation/pitch bend lever so the weight of the keyboard isn’t resting on it.
The screws securing the base on the keyboard are shown in Photo 1.
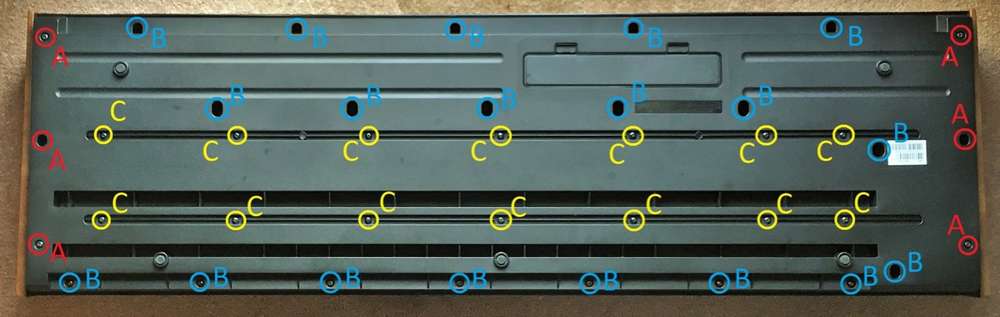
1 – Location of screws underneath
- Remove the 6 screws marked “A” and 19 screws marked “B”, keep them separate as they are different. DO NOT remove the screws marked “C” screws at this stage.
Next carefully lift the rear edge 100mm or so as there are cables that need to be disconnected.
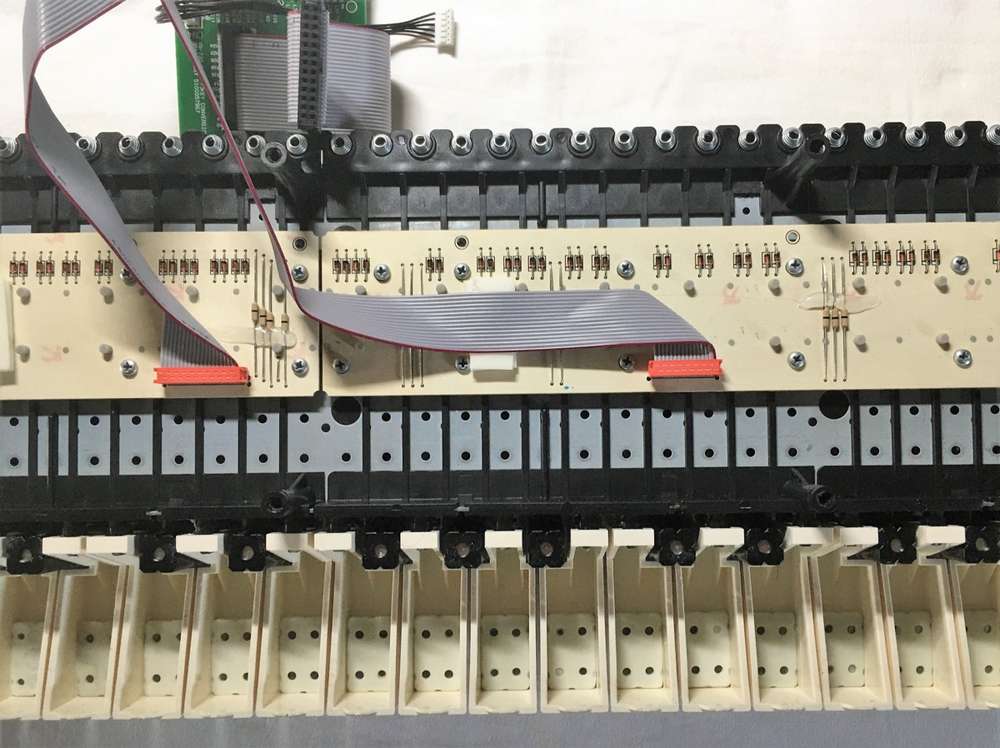
The ribbon cable and a 6-way cable from the 73 key conversion board to the main board needs to be unplugged.
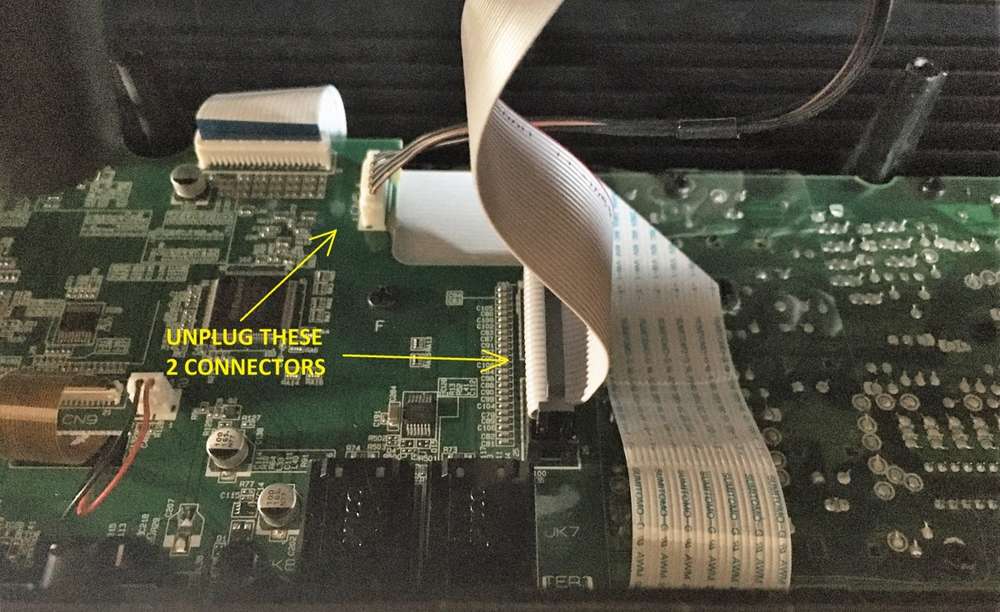
2 – cables to unplug from main board
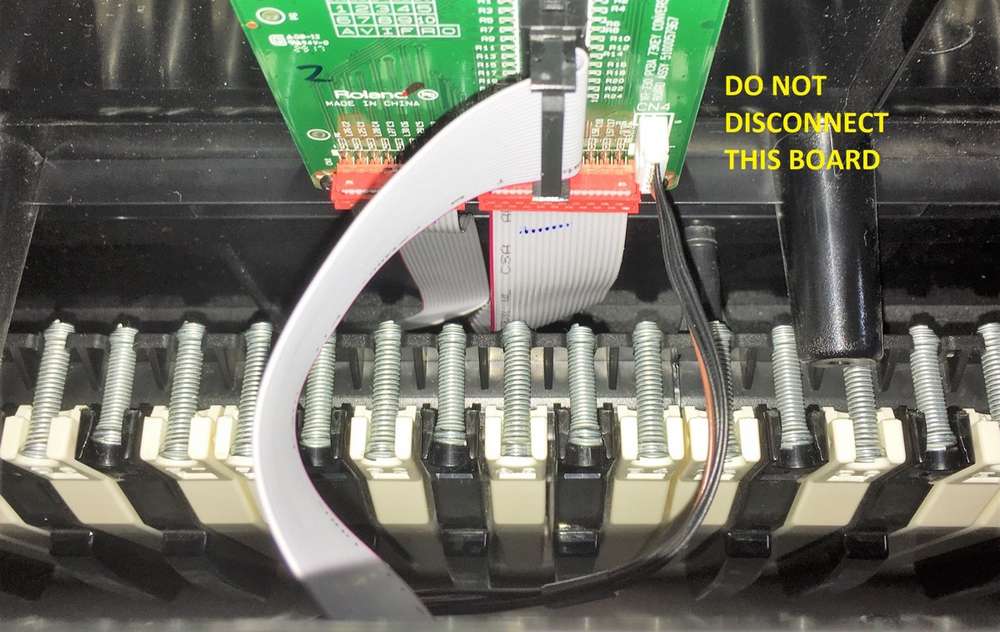
3 – other end of cables in photo 2
- Photo 2 shows the mainboard end and Photo 3 the key bed end. They can be unplugged at either end but I find the mainboard end easier (photo 2). Grip the plugs and carefully pull straight out, do not twist or bend, do not pull by the cables. No need to disconnect the conversion board but in any case DO NOT try to disconnect the red connectors
Unplug the twin cable from the battery compartment from the main board, also unclip where shown in Photo 4.

4 – cable to unplug from main board
- Lift off the base unit with the key bed still attached and remove the 4 small screws securing the 73 Key Conversion Board to the base. DO NOT try to disconnect the red connectors – see Photo 5.
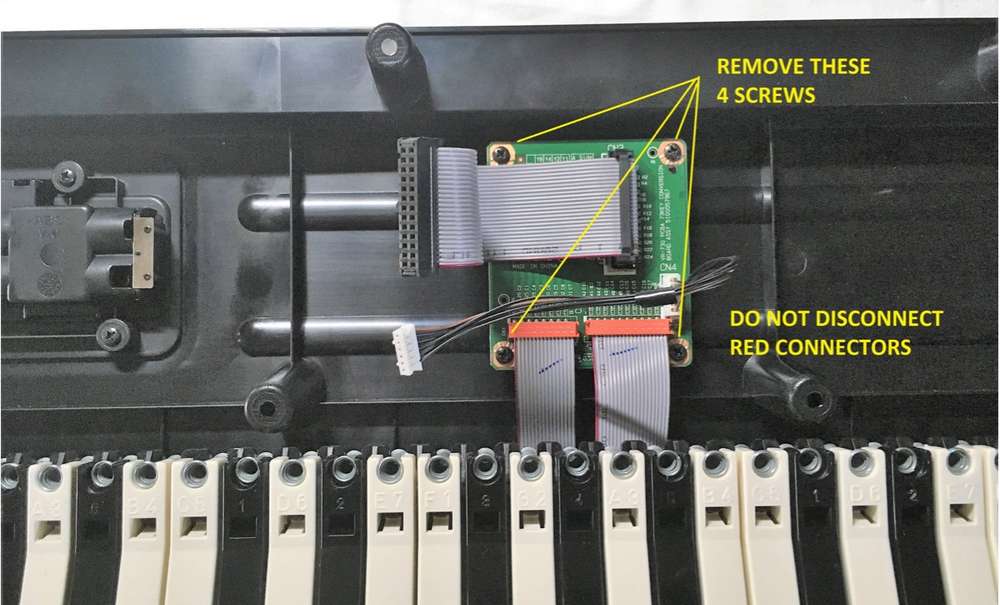
5 – 73 key conversion board
- Turn the base back over and remove the 14 “C” screws shown in Photo 1. Now the base can be lifted away leaving the key bed free (conversion board still attached)
6 – keybed removed
DO NOT try to disconnect the red connectors, they are easily damaged so best left in place
- The key bed can now be cleaned by blowing (aerosol cans of compressed air are very useful for this) or a vacuum and is usually sufficient to remove dust and debris causing problems. Further dismantling is not recommended.
The key contacts can be seen in the following photos 7 – 9. Dismantling is an intricate task which often involves replacing rubbers and/or contacts – best left alone unless absolutely necessary and then only if you know what you are doing.
- Reassembly is simply the reverse process. Remember that most of the screws go into plastic so DO NOT OVERTIGHTEN.
Fix the keybed and conversion board back into the base then carefully turn over to fit the “C” screws, screw the conversion board back in place.
Put the re-assembled base unit in place lifting the rear to reconnect the cables to the main board. Take care when re-connecting leads that plugs are fitted carefully – properly aligned to avoid bent pins. It is useful at this stage to test everything is working before replacing the remaining screws.
If everything is working as it should the remaining screws can be fitted taking care not to mix up the “A” and “B”
And that’s job done
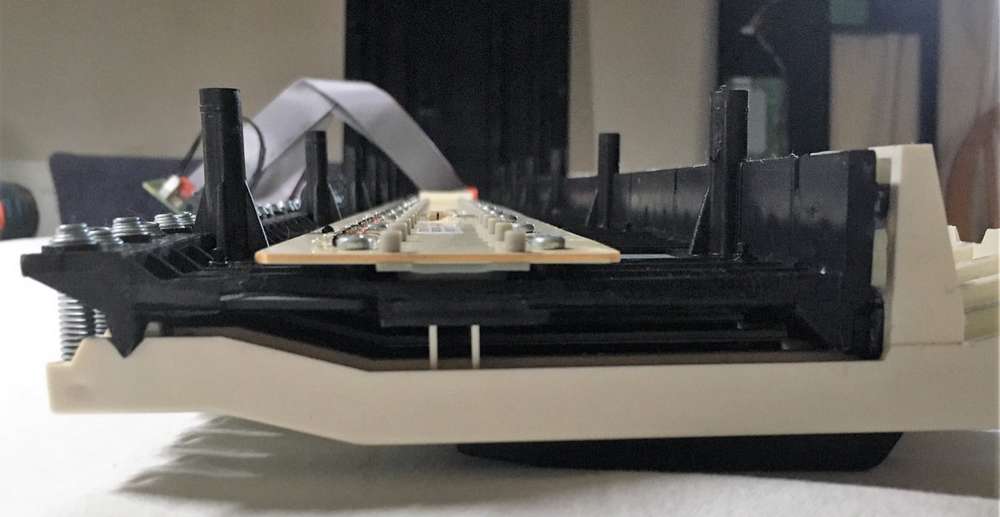
7 – keybed detail 1
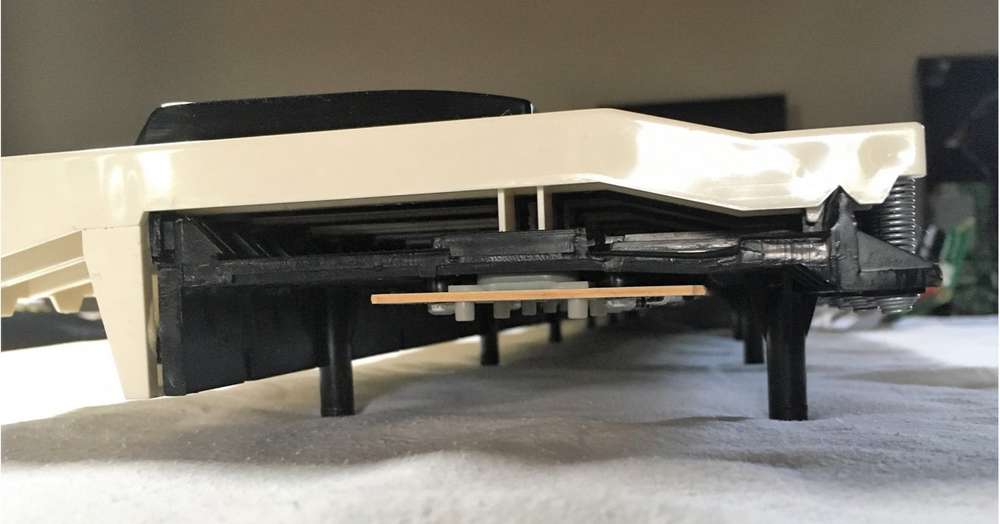
8 – keybed detail 2
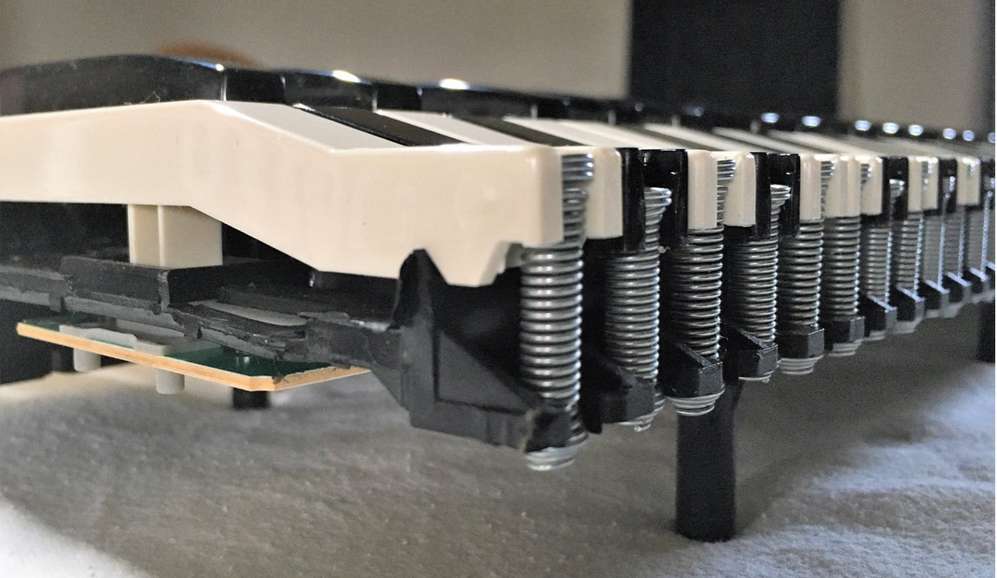
9 – keybed detail 3