VR system options
VR09/730 have a series of (undocumented) ‘system options’, for example:
– show a ‘EFX value matrix’
– execute a fast factory reset
– switch a VR09 into a VR730 and vice versa
– disable organ key click, change organ ‘foldback’ type
– run system and hardware tests
Show EFX ‘matrix’
- move the CURSOR onto a sound in the display (it must not be on the registration number)
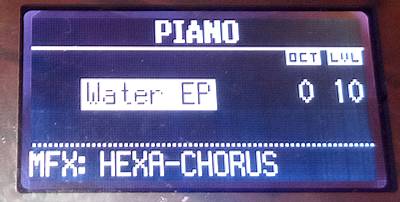
- press and hold the [ENTER] button (near the dial) for ca. 2 seconds: a window popps up showing all 6 EFX ‘pot values’
- keep holding the [ENTER] button down while working on the pots

Fast factory reset
this method is much quicker than ‘dialing through VR menu’:
- power VR off
- press and hold the [ORGAN] button (in center MODE / one-touch section)
- power VR ON (VR starts directly with factory reset)
Switch VR09 to VR730 and vice versa
you can turn your VR09 into a VR730 ‘with limitations’
This will give you access to ‘VR730 exclusive’ sounds (like Y2K Concerto, Water DP etc) and ‘730 Key touch option’
The limitations (probably to prevent VR09 owners to use it as VR730 😉 ) are ‘handicaps’ on the keybed :
– the keyboard is transposed a third up
– the highest key (C7) of VR09 keybed plays a bass E2 tone 🙂
Switchom VR09 into VR730 mode is easy:
– set VR into ‘test mode’ and swap the ‘model’ (explained in “Run your VR09 as a VR730” down on the page)
– reboot VR
The ‘keybed handicap’ makes unreasonable to permanently run a VR09 in 730-mode, but it can make sens if you ‘want’ to have VR730 exclusive sounds on let’s say one or two songs of your setlist: switching a VR09 into 730-mode ‘between songs’ is a 15 second affaire, which can easily be ‘done’:
At home prepare a ‘730 registration’: set VR09 into 730 mode, program the ‘730-patch’, transpose one third down, save to a registration.
During the ‘gig’ when it comes the ‘the song’, reboot VR09 into 730-mode and dial to the registration. After the song, reboot VR09 back into 09 mode
The only constraint left is the ‘unusable’ highest key – just avoid to play it for this song 🙂
Another option would be the use of a midi keyboard: the ‘keybed handicap’ does not apply to external midi controllers: with a midi keyboard you can use VR09 as a full-fledged VR730
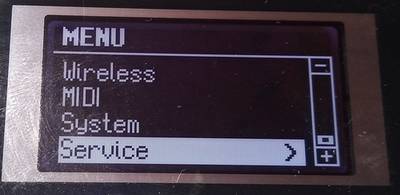
The hidden menu ‘service’
The (hidden) ‘service menu’ is opened with a button combination:
- press & hold the [<<] AND [>>] buttons (of DRUM section)
- press the [FAST/SLOW] button (in ROTARY SOUND section)
- VR display will show a ‘Service’ menu, [ENTER] the menu
- navitage with the [CURSOR] buttons
Menu parameters that affect VR sound:
‘Vintage Noise’ : ‘off’ disables completely VR organ ‘key click’
‘Fold Back Type’ : Hammond organ use different ‘organ foldback’ configruations. Type 1 corresponds to B3/C3, Type 1 is earlier models

VR ‘test-mode’ and ’09/730 model switch’
This mnode sets VR into a mode where you can toggle VR09 and VR730 mode and e.g. test the functioning buttons, keys, Displayh etc)
You start test-mode with a button combination:
- press & hold the [<<] AND [>>] buttons (of DRUM section)
- press & the [ORGAN] button (of center MODE / one-touch section))
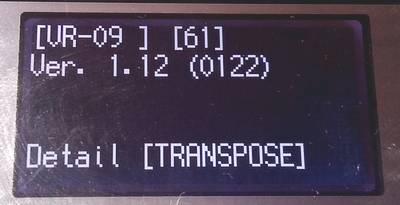
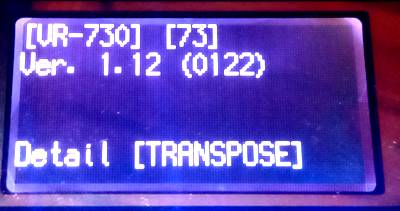
- VR display will lgiht up all buttons and switch into ‘test’ mode showwing the ‘firmware info page’
- To quit the test menu, VR must be restarted

To navigate in the test menu:
Navigation uses the 3 buttons of the center MODE (one-touch) section):
- press & hold [SYNTH] button, keep it hold
- to step pages forward, press [ORGAN] button
- to step pages backward, press [PIANO] button
Run your VR09 as a VR730 (and vice versa)
Test-menu must be in ‘firmware info page’
- press [FAST/SLOW] button (in ROTARY SOUND section) to switch VR into VR730 mode
- press [ON/OFF] button (in ROTARY SOUND section) to switch VR into VR09 mode
- restart VR: it will will reboot in the selected VR model
You’ll probable notice a difference in ‘key feel’: go to the ‘new’ VR menu ‘Keyboard’/’Keytouch’: option’SuperLight corresponds to ‘original VR09’-feel
 |
 |
 |
Extended software info
Test-menu must be in ‘firmware info page’
Press [TRANSPOSE] button to step through ‘software info pages’
Test opions
Use the menu navigation [SYNTH] + [ORGAN] to step througth the test menu (to go back, press [SYNTH] + [PIANO)
Generally: a ‘blinking button’ tells you that it wants to be pressed 🙂
- Encoder: test the dial wheel by spinning it
- Switch: you can function test all ‘buttons’: press the actually blinking buttons, then the next button etc
- LCD check: subsequently press binking [ORGAN] to test the display (e.g. defective LCD crystal cells)
- LCD Contast: adjust the contrast with the dial wheel
- LCD Backlite: press [TRANSPOSE], then [ORGAN]
- A/D: propabely tests the digital-analog converters
- Sound CHeck: sends a peep sound
- Ext Input: test external audio in
- D Beam Check: hold your hand over the dbeam to test if it reacts
- Battery Adjust : shows information about battery/power supply
- Battery Check: shows information about battery/power supply
- Key: Push keys to test for ‘piano’: if done for all keys [ORGAN] button will blink: press for next test ‘organ’, repeat key test
- Device Check: internal hardware check info
- Factory Rest: press [TRANSPOSE] to execute an emidiate factory reset
- Auto OFF check: press [TRANSPOSE] to test VR auto off